How to Make Cherry Cheesecake: A Step-by-Step Guide for a Perfect Dessert
There’s something irresistibly special about a homemade cherry cheesecake. Maybe it’s the rich, creamy filling, or the tangy burst of cherries on top that perfectly balances the sweetness. Whatever the reason, this dessert has a way of making every occasion feel more memorable. Whether you’re making it for a holiday gathering, a birthday celebration, or simply for an indulgent treat, you can’t go wrong with this classic dessert.
In this step-by-step guide, you’ll learn everything you need to know to make a cherry cheesecake that will impress every guest and satisfy even the most discerning sweet tooth. From preparing the perfect crust to making the creamy filling and homemade cherry topping, we’ve got you covered. Let’s dive into this deliciously fun baking adventure!
Table of Contents
1. Ingredients for Cherry Cheesecake
Before you begin baking, make sure you have all the necessary ingredients. Here’s a list of everything you’ll need to create a perfectly layered cherry cheesecake, from the crust to the creamy filling and cherry topping.
Cheesecake Crust Ingredients:
- 1 ½ cups graham cracker crumbs
- ¼ cup granulated sugar
- ⅓ cup melted butter
The crust is the base of your cheesecake and adds a delightful crunch to complement the smooth filling. You can use graham crackers or even chocolate cookies to create a twist on the traditional flavor.
Cheesecake Filling Ingredients:
- 3 packages (8 oz each) cream cheese, softened
- 1 cup granulated sugar
- 3 large eggs
- 1 tsp vanilla extract
- 2 tbsp all-purpose flour
- ½ cup sour cream
The filling is the heart of your cheesecake. Using softened cream cheese helps create that rich and creamy texture you’re after. Don’t forget the vanilla extract for flavor depth!
Cherry Topping Ingredients:
- 1 ½ cups fresh or canned cherries (pitted)
- ½ cup granulated sugar
- 1 tbsp cornstarch
- 1 tbsp lemon juice
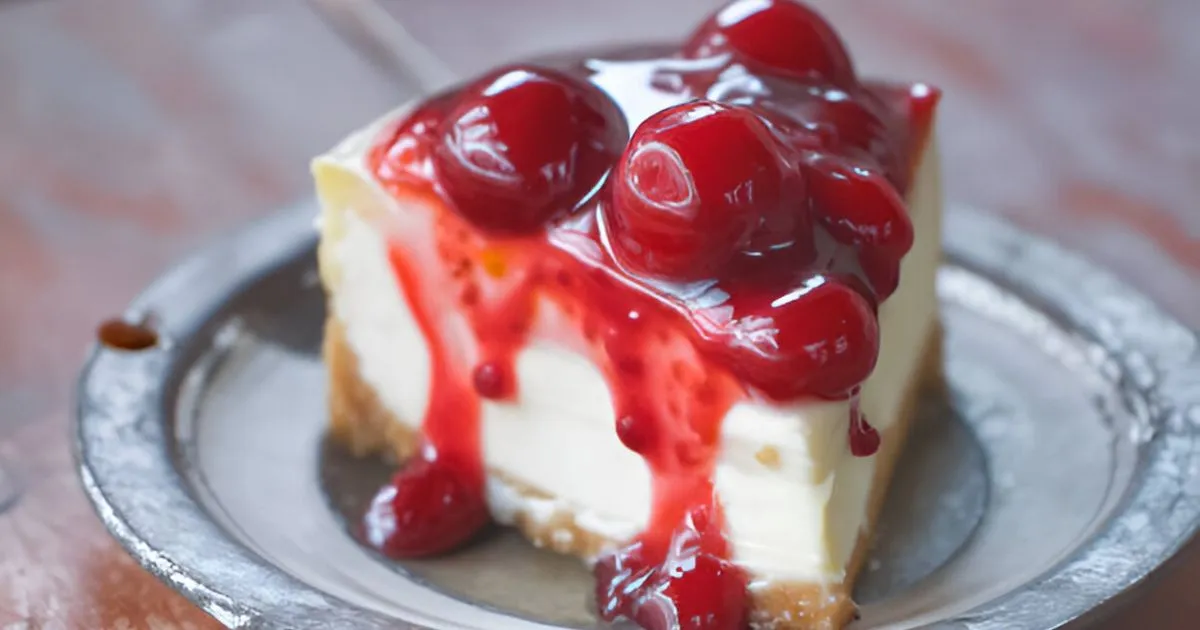
A sweet cherry topping crowns your cheesecake beautifully. Whether you use fresh or canned cherries, the topping will add a burst of flavor and color to your dessert.
2. How to Make the Cheesecake Crust
A solid crust is the foundation of any cheesecake. In this step, we’ll guide you through the process of making a simple, yet perfect, graham cracker crust that will hold up well and provide a delicious contrast to the smooth filling.

Steps:
- Preheat your oven to 325°F (163°C).
- Combine the graham cracker crumbs and sugar in a mixing bowl. Stir until the sugar is evenly distributed throughout the crumbs.
- Add the melted butter to the mixture and stir until everything is well combined. The butter should coat all of the crumbs, making it sticky enough to press into the pan.
- Press the mixture into the bottom of a 9-inch springform pan. Use the back of a spoon or the bottom of a glass to evenly press the crumbs into a firm, compact layer.
- Bake the crust in the preheated oven for about 10 minutes, then remove it and let it cool completely. This ensures that the crust will firm up and not crumble when you slice the cheesecake.
3. How to Make Cherry Cheesecake Filling
Now, for the most exciting part: the cheesecake filling! This smooth, velvety layer will make the base of your cherry cheesecake rich and creamy. Follow these easy steps to create the perfect filling.

Steps:
- Beat the softened cream cheese in a large mixing bowl using an electric mixer on medium speed. Continue beating until the cream cheese is smooth, with no lumps.
- Add sugar to the cream cheese and mix until combined. The sugar helps balance the richness of the cream cheese and adds a touch of sweetness.
- Add the eggs one at a time, mixing well after each addition. This step is essential for creating a smooth filling with no egg lumps.
- Stir in the vanilla extract and flour. Vanilla adds a lovely depth of flavor, while flour helps stabilize the filling as it bakes.
- Mix in sour cream to the batter and beat until the mixture is smooth and fluffy. Sour cream contributes to the cheesecake’s creamy texture and enhances the overall flavor.
- Pour the cheesecake mixture over the cooled graham cracker crust. Use a spatula to smooth out the top.
4. Assembling the Cherry Cheesecake
Once the crust and filling are prepared, it’s time to assemble your cherry cheesecake. Here, you’ll combine the two layers to create a perfect base for the topping.
Steps:
- Spread the cheesecake filling evenly over the graham cracker crust. Use a spatula to ensure that the filling is evenly distributed and smooth across the top.
- Place the cheesecake in the oven and bake at 325°F (163°C) for 50-60 minutes. You want the edges to be set, but the center should still have a slight jiggle when you tap the pan. This ensures a creamy texture.
- Cool the cheesecake in the oven with the door slightly ajar for about an hour to prevent cracking.
- Remove the cheesecake from the oven and let it cool to room temperature before transferring it to the fridge. Refrigerate for at least 4 hours, or ideally overnight, to allow the cheesecake to set fully.
5. How to Make Cherry Topping
The cherry topping is what brings the cheesecake to life. Whether you use fresh or canned cherries, this simple topping adds a burst of color and sweetness. Here’s how you can make it:

Steps:
- Combine cherries, sugar, cornstarch, and lemon juice in a small saucepan. Stir well to combine all the ingredients.
- Cook the mixture over medium heat, stirring frequently. As it cooks, the cherries will release their juices, and the mixture will thicken. This usually takes around 5-7 minutes.
- Let the cherry topping cool before spreading it over the cheesecake. If you’ve used fresh cherries, this will help retain their texture. If you used canned cherries, this step helps thicken the syrup.
6. Baking and Cooling Your Cherry Cheesecake
Proper baking and cooling techniques are crucial to a perfect cheesecake. A slow, gentle bake and a cooling period will ensure your cheesecake has the right texture and doesn’t crack.
Steps:
- Bake the cheesecake at 325°F (163°C) for 50-60 minutes, checking for the slightly jiggly center. Do not overbake.
- Turn off the oven and leave the cheesecake in for another hour with the door slightly open. This gradual cooling helps prevent cracks.
- Allow the cheesecake to cool completely at room temperature, then refrigerate for at least 4 hours to allow it to firm up and set.
- Add the cherry topping once the cheesecake has cooled and set.
7. Tips for a Perfect Cherry Cheesecake Every Time
Making the perfect cherry cheesecake requires a few extra tips to ensure the best results. Here’s what you can do to achieve cheesecake perfection every time.
- Use room temperature ingredients: This ensures your batter is smooth and free of lumps.
- Don’t overmix the filling: Overmixing can cause air bubbles, which can lead to cracks in the cheesecake.
- Consider a water bath: This technique helps bake the cheesecake more evenly and can prevent cracking.
- Refrigerate overnight: Cheesecake benefits from a long cooling period, which allows the flavors to meld and the texture to set perfectly.
8. FAQ Section: Cherry Cheesecake Questions Answered
Q1: Can I make this cheesecake in advance?
Absolutely! In fact, cherry cheesecake is one of those desserts that taste even better the next day after the flavors have had time to meld. You can prepare it a day or two ahead of time and store it in the fridge until ready to serve.
Q2: Can I make the crust without graham crackers?
Yes! You can substitute graham crackers with cookies like Oreos, digestives, or even a gluten-free option for a unique twist.
Q3: How do I prevent my cheesecake from cracking?
The best way to prevent cracking is to avoid overbaking, use room temperature ingredients, and let the cheesecake cool gradually.
Q4: Can I freeze the cherry cheesecake?
Yes, you can freeze your cheesecake for up to a month. To do so, cover it tightly in plastic wrap and foil. When ready to serve, thaw in the fridge overnight.
9. Conclusion
Congratulations—you’ve now mastered the art of making a delicious cherry cheesecake! From the buttery graham cracker crust to the creamy filling and sweet cherry topping, every step is important for creating a cheesecake that’s not only gorgeous but delicious too. With a little time, patience, and love, you can now bake this perfect dessert for any occasion.
What are you waiting for? Gather your ingredients and get started! There’s no better time to bake a cherry cheesecake than right now. Once you’ve made it,

